10.2 Creating an Assignment in Blackboard
Creating Assignments in Blackboard can be a difficult process if you do not understand all of the components involved. To create an assignment, the instructor should already have a good idea on what students will need to accomplish.
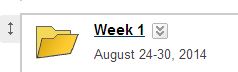
To start, locate a weekly folder in your Course Content area through the Course Menu.
To start, locate a weekly folder in your Course Content area through the Course Menu.
Assignments always go inside of the Assignments folder in your weekly folder content area. Locate the Assignments folder and click to enter.

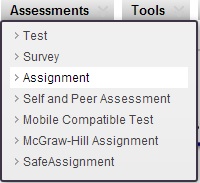
Next, locate the Assessments bar and click on Assignment from the menu.
First, the assignment needs a Name. For example, Week 1 Assignment 1. The name of the example's assignment shows the number of the week. This information assists with organizing weekly material within the Grade Center, and provides students a clear name to reference when communicating any issues to the instructor.

After you have a name for the assignment, you need to include instructions for the student to follow. Assignment instructions should be specific, detailed and include all of your expectations so students know exactly what they must do to complete the activity. Additionally, it is a wise idea to include submission instructions with every individual assignment.
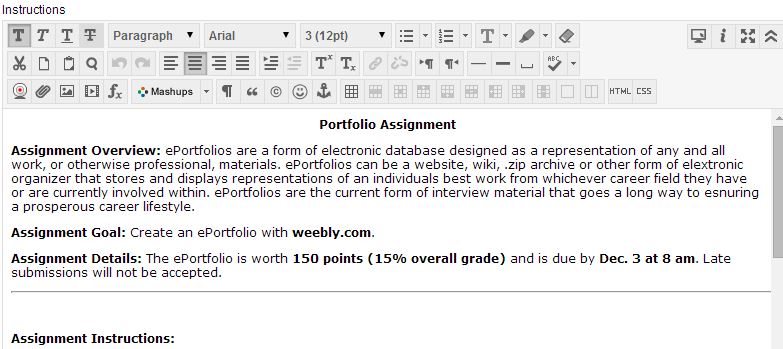
After creating your assignment details, and instructions make sure to include specific "Submission Instructions" for your students to follow. These instructions should include how to name files (if any are required for submission), how to attach or insert the assignment content, and how to submit the assignment after completing the first two tasks. For example:
Directions for submitting your assignment:
- When you have completed the written assignment, save the file on your computer with your name as part of the file name, for example: Firstname_Lastname_[using your first and last name].
- Click on the assignment's link above.
- Click on the "Browse" button to attach your file.
- Once you have attached your file, click on the "Submit" button to send your file to your instructor for grading.
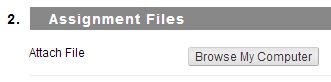
How to Attach Files
In the event that students are required to read any documents, .pdf file formats are strongly recommended to reduce course size in Blackboard. Reserve Word, Excel and Access file attachments for assignments where students must complete large-scale tasks such as group projects, fill in forms, charts, datasheets etc.
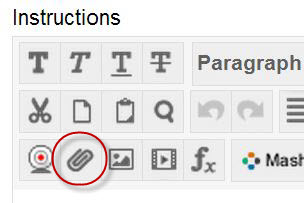
In either case, to include files with your assignment, you may do one of two things. First, locate and click on the Attach File icon on the tools bar. This allows you to insert a file link directly into the text field so you can provide specific examples such as;
In either case, to include files with your assignment, you may do one of two things. First, locate and click on the Attach File icon on the tools bar. This allows you to insert a file link directly into the text field so you can provide specific examples such as;
Step One: Download the following file which contains a worksheet you must complete: <insert file>
Step Two: Review all instructions within the worksheet, and answer all questions to the best of your ability.
Step Three: Rename the completed file with your LastName included in the file name.
Step Four: Follow the Directions for Submission below to submit your assignment to your instructor for grading.
The second option for attaching files involves clicking on the Browse My Computer button. This attaches files directly under the name of the assignment title link. However, this may confuse students as the file is not directly associated with any descriptions or instructions.
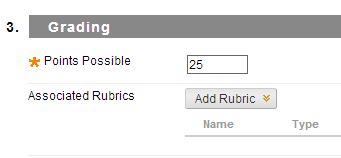
Scroll down a little until you see Grading. This is where points are applied to the assignment and a Grading Rubric can be associated to the assignment (see Chapter 11). Review the instructions and expectations of the assignment, and choose a balanced amount of points the assignment should be worth. Enter this number next to Points Possible.
Next, scroll down a little and make sure that the box next to Make the Assignment Available is checked. If this is not checked, students will be unable to see the assignment(s) you create.

Additional Assignment Options
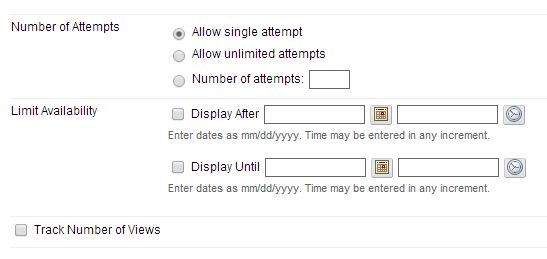
While it is possible to grant multiple attempts, limiting availability and track how many of your students actually click on the assignment, all of these tools can cause more complications than they are worth.
Typically, assignments are designed to assess a students knowledge of the information they have reviewed or been taught through the week. As such, students have one attempt to prove their comprehension (like in tests) and how to apply the skills they have learned. Instructors have the ability to provide additional attempts under unique circumstances.
Limiting availability may result in issues that could violate ADA compliance, as well as create conflicts with schedules and other date criteria established in the course. Best to leave these untouched.
Tracking student access of assignments is rather redundant considering students must access the link to submit their completed assignment.
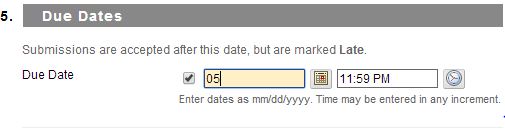
Adding a Due Date to an assignment is a great idea, and Blackboard provides a tool for you to include Due Dates. The biggest benefit of including a Due Date is when students submit late work. The Grade Center flags these late submissions as Late, making it easier for instructors to identify late work.
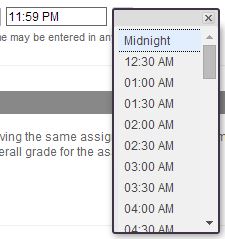
To add a Due Date, check the box next to Due Date and either enter a date manually or click on the small Calendar icon to choose a date. You can even specify a time on that day by entering a time manually or clicking on the Clock icon.
To add a Due Date, check the box next to Due Date and either enter a date manually or click on the small Calendar icon to choose a date. You can even specify a time on that day by entering a time manually or clicking on the Clock icon.
|
|
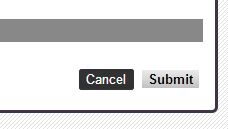
When you are satisfied with your Assignments criteria, click the Submit button.
Next Steps
When you are ready, continue to Section 10.3 Chapter 10 Activities.
