5.2 Making Quizzes in Collaborate
As a moderator, you have the option to send quizzes to the participants in your Collaborate room. Quizzes are a good ice breaker, as everyone can see the results, if you release them. Quizzes can also be used at the end of a lecture to give the moderator an opportunity to clarify "muddy" points in the lecture, based on the quiz results.
First, log into your Collaborate room. From the toolbar at the top of the screen, select “Window” and then “Show Quiz Manager.”

The Quiz Manager will open. Click the icon that looks like a piece of paper with a yellow star on it. This creates a new quiz.

Give your quiz a name using the text-entry box at the top of the screen. Then, click the icon that looks like a question mark with a green plus sign on it to make your first quiz question.

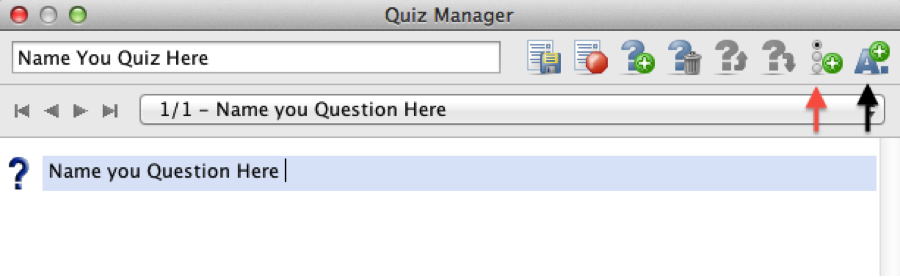
Next to the question mark, enter the question you want to ask your students. To add possible answers to your questions (multiple choice-style), click the button on the top right of your Quiz Manager window that looks like three radio buttons with a plus sign (see the red arrow in the screenshot below). You must click this button each time you want to add a potential answer to your question.
Alternatively, you can leave a space for a “short answer” response by clicking the “A” icon (see the black arrow in the screenshot below).
Alternatively, you can leave a space for a “short answer” response by clicking the “A” icon (see the black arrow in the screenshot below).
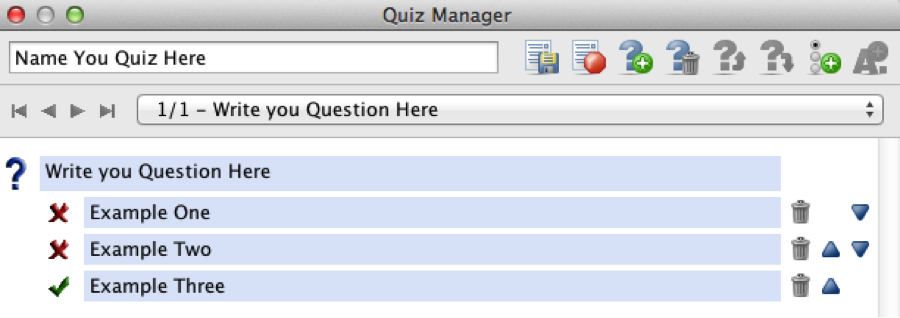
By default, each potential answer you enter for a multiple choice question is marked as incorrect with a red “X” to the left of the answer. Mark the correct answer by clicking on the corresponding red “X.” This will change the “X” to a green check mark.
To make another question for your quiz, click the icon that looks like a question mark with a plus sign on it. You can make as many questions for your quiz as you like.
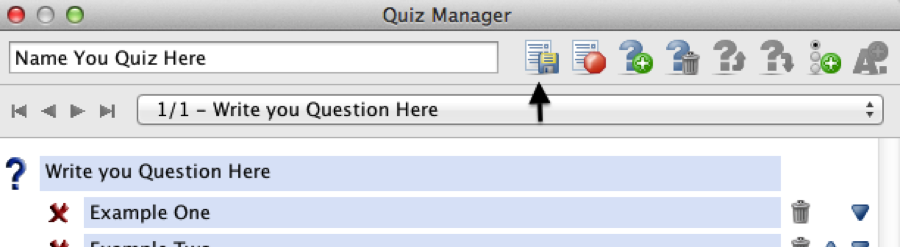
When you are finished adding questions to your quiz, save your quiz by clicking the “save” icon (see the black arrow in the screenshot below).
When you are finished adding questions to your quiz, save your quiz by clicking the “save” icon (see the black arrow in the screenshot below).
Next Steps
When you are ready, move on to Section 5.3 Using Application Sharing
