8.1 Writing Weekly Overviews
When a student looks into a course, they expect to see what weekly activities are in store for them. After creating the template for the weekly overviews, summaries, and assignment lists, you should begin fill in the blanks (the XYZs you entered in Chapter 7).
To begin, enter the Week 1 folder and locate the Overview.
To begin, enter the Week 1 folder and locate the Overview.

|
|
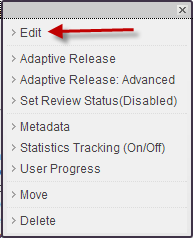
Left-click on the double arrows next to the Overview header and select Edit.
You should see a screen with text tools that look a great deal like Microsoft Word. Additionally, you should notice a title line and a large white box (which contains the overview you created in Chapter 7).

Remember this item is for your “global” learners who just need a “gist” of the week. It’s an introduction to the week, and it must be short (no more than 2-3 sentences). Overviews also contain the objectives for the week. Each week should have objectives that support student mastery of the Course Objectives. While replacing the blanks, make sure you have a copy of the Course Calendar to make sure material aligns with the weekly content.
Original Statement"This week, we will study XYZ."
"We will read chapter X of your textbook, participate in an online discussion, and complete the Week X assignment."
"By the end of this week, you will be able to:
|
Example Statement"This week, we will study Chapter 1: Starting out."
"We will read Chapter 1 of your textbook, complete the Week 1 assignment, participate in an online discussion and take a quiz."
**Keep in mind this may change depending on the content in the week. If there is a quiz or other item a student should be working on, state so. "By the end of this week, you will be able to:
|
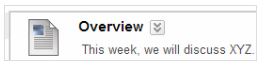
After you fill in the blanks (XYZ), your finished product should look like the image below.

Once you have completed the overview, review the information and make sure it is correct. If everything is correct, click Submit.
Next Step
When you are ready, move on to Section 8.2 Writing Weekly Summaries.
