12.3 Deploying an Existing Test.
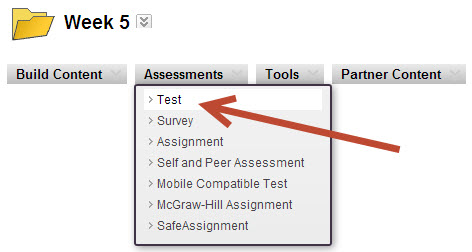
After creating a Test, all that is left to do is place the Test in your course. Select which week from the course content that you would like to place the Test. Direct your cursor to the Assessments tool button and select Test. This will take you to the Create Test page.
Once on the Create Test page, select the test you would like to add from the Add an Existing Test list. Then click Submit.

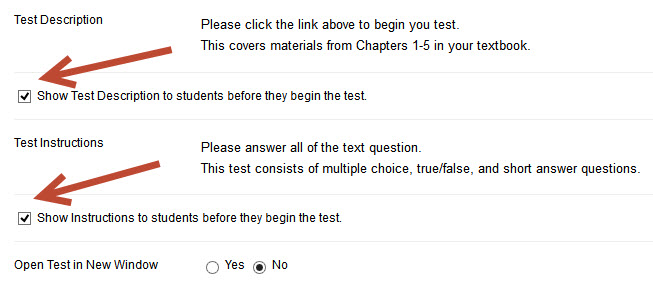
You will be redirected to the Test Options. This is where you can modify the instructions, availability, due date, feedback, and presentation of the test. Within the Test Information section, make sure you click the check boxes next to Show Test Description and Show Instructions.
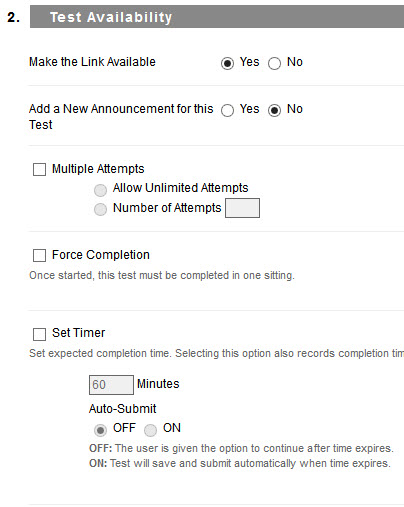
Within the Test Availability section, you can modify how students access the Test. This includes when the test is displayed, how many attempts can be made to complete the test, force completion (which automatically submits the test at the end of a set timer), and a timer to limit how long students have to complete the test.
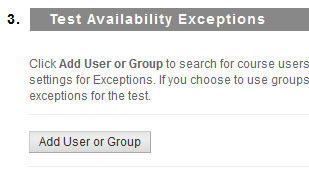
Next is the Test Availability Exceptions. This allows select students to become exempt from certain constraints that are applied to the test. We will cover this in more detail in section 12.4 ADA Compliance Features in Tests.
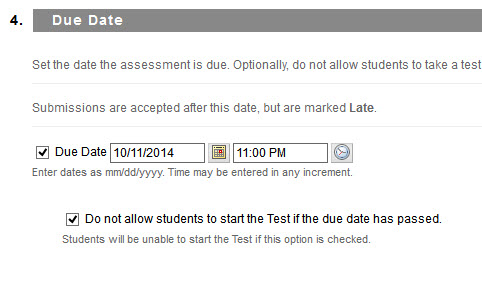
Next, you must apply Due Dates. This specifies the drop date for completing the test. To add a Due Date, click the check box and enter the date at which the test is due, followed by the time when it needs to be finished. See section 3.2 Changing Due Dates and Availability for more information.
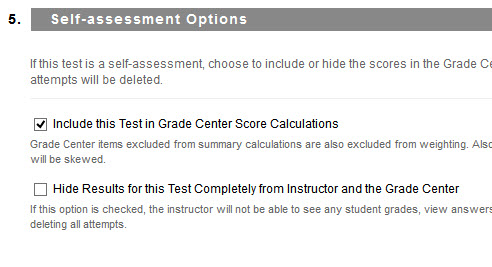
Self-assessment Options permits the test to calculate within the overall grade in the Grade Center. Additionally, you can Hide Results, which is typically not recommended. Usually you would like the scores to be paced in the Grade Center and not to be hidden. So make sure you check the check box next to Include this Test in Grade Center Score Calculations and not next to Hide the Results.
Show Test Results and Feedback to Students is the next section within the Test Options. This section gives you options on when to view the test results and scores. In addition, you can choose which questions are shown after the test as well as feedback from the instructor. Most test results are shown after submission and the score is shown.

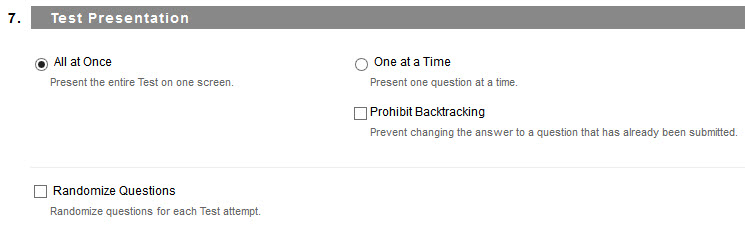
The last section is the Test Presentation. This gives you the different options on how to present the questions of your test. You can either show all of the questions on one screen or one at a time. When you are finished click Submit.
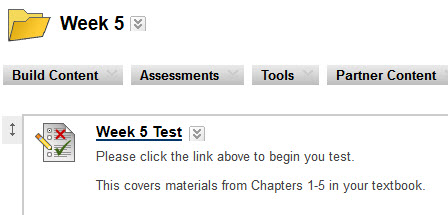
After clicking Submit, the test link shows up in the content area. Students need only click on this test link to begin this test.
Next Steps
When you are ready, move on to Section 12.4 ADA Compliance Features in Tests.
